
Learning to Sew in a Straight Line
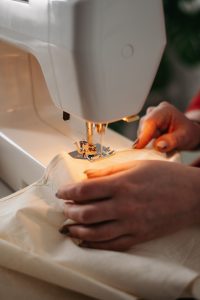
Believe it or not, sewing a straight seam line is harder than it seems, especially for young beginners. It takes a good amount of practice for a beginner sewist of any age to create long, beautiful, straight lines of stitching. But never fear–StitchPop for Kids is here! Here are a few tips for how to help beginners sew in a straight line.
- Draw the seamline. Use chalk or disappearing ink and a ruler to draw where the seam needs to be sewn. Have the beginner watch the line that is drawn to make sure the stitches are following it.
- Masking Tape. Cut a strip of masking tape or washi tape about 6-8 inches long. Then, use a ruler to lay it down on the bed of the sewing machine where the edge of the fabric needs to travel in order to have the correct seam allowance (usually around 1/2 inch or 5/8 inch). The beginner would then watch the edge of the fabric to make sure it follows the edge of the strip of tape while sewing.
- Use the Presser Foot as a Guide. If your seam allowance is around 1/4 inch to 1/2 inch, you can use the edge of the presser foot as a guideline and focal point to keep your stitching line straight. We recommend using this step after using step 1 or 2 for awhile.
- Secret Bonus Tip! Okay, we said we had 3 tips, but there is another key principle we want to mention. And that is …….insert drum roll here ………. practice! Yes, there’s truly no substitute for practice. So grab a square or fat quarter of fabric, and just let that kid or teen go to town sewing as many straight lines as possible. Try each of the methods here, or any other method you choose. Use high-contrast thread so they can really see their progress as they practice.